
The BTD series was a distinguished one. Most will call it the “mother of all tower defense games”. Because that is what it was.
BTD stands for Balloon Tower Defense, and it is a wildly popular game among kids and adults alike. The point of the game is to place towers which will pop balloons when they came into a certain range. As you steadily progress, rounds get harder, money gets dry, and your strategy is what you will need to survive.
A Quick Introduction
Ballons (or bloons in BTD speak) get steadily harder to pop as you go along. The first few layers of a ballon are ordinary, from the innermost red to a varying blue, yellow, pink, green, and so on. Each of these bloons have a different effect after they are popped. For instance, the pink ballon will spawn 2 yellow ballons when popped. Learning about these effects are the first step to becoming decent at BTD5. While different colored bloons make them a little more powerful, there are also special types of bloons that have different effects.
The camo effect, as seen with the two center bloons in the picture below, can only be seen by certain towers. You can mostly figure out whether a tower can see camo by its upgrades, as almost all towers can’t see camo initially, but with an upgrade it may be able to. Some towers will never be able to see camo on their own (but with some help), and some can just see camo without any upgrades (Ninja Monkey).
The regen effect, seen by the heart shape of a bloon, allows it to slowly regain layers if that bloon hasn’t been popped recently. Regens are not particularly dangerous, and their effect is practically eliminated in late game, where your towers will attack so fast that the regens won’t have time to regain layers.


Lead 
Black 
White 
Ceramic 
Zebra 
Rainbow 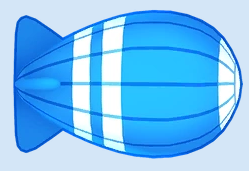
MOAB 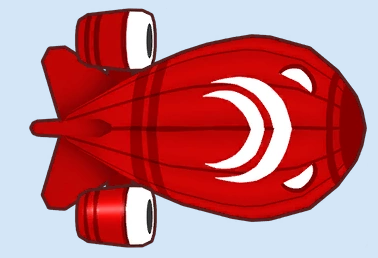
BFB 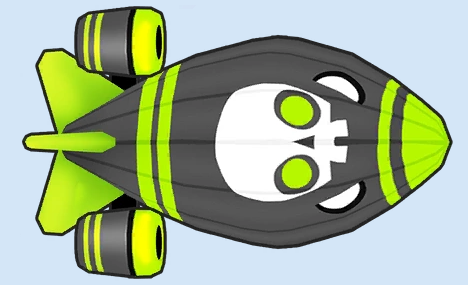
ZOMG
Lead bloons can only be popped by some towers. Again, lead ability can usually be determined by upgrades and pure intuition alone (fire, lighting, etc, pops lead). If you really aren’t sure, however, you can always search up that tower name and find out.
Black bloons are immune to explosions, while white bloons are immune to freezing. Zebra bloons have the properties of both black and white bloons. Ceramics are a much harder to pop ballon, because the first layer takes 10 hits to pop before it releases a Rainbow bloon.
MOAB-class bloons are especially dangerous. The regular blue MOAB is the easiest MOAB-class to pop, and after it gets popped it releases some ceramic bloons. The BFB is even harder to pop, and releases 4 MOABs. The ZOMG is the hardest MOAB to pop, and has 4 BFB inside it! This means that a ZOMG will eventually release 16 MOABs!
Upgrade Notation
Each tower has two upgrade paths. These paths allow the tower to be good at two different things. For example, the first path of a ninja tower allows for good popping power, but the other path provides a nice bloon stun. The third and fourth upgrades can only be purchased for one path. So purchasing 3 upgrades on one path will lock the other path to only two upgrades. A quick way to tell someone how many upgrades a tower has on each path is very simple, with numbers like so: 4/2. The number on the left tells how many upgrades the tower has for the left side path, and the right number tells the number of upgrades on the right path. An tower that is not upgraded at all will be represented as 0/0. If there is room for any number of upgrades on a certain path, it can be shown as *any number*/x. For instance, a 2/x tower has 2 upgrades on the left path and any number of upgrades on the right path.
My Main Strategy
This method of beating BTD will work for most Beginner and Intermediate maps, but struggles at higher difficulty. This is just an easy and fun way to beat BTD5. This method can be executed in hard mode. The nice thing about this method is its pure simplicity. It only uses a few types of towers and is easy to get going.
Ninja Tower
This tower is a good starter, and a very versatile tower. It can pop camo without upgrades, and is very cost effective. Place a 0/0 ninja at the beginning, and it should be able to easily handle the next few rounds. Be sure to upgrade it as you get money, or place more if you need to. Generally speaking, this is only a starting tower, but an overall good one.
- Camo: Can pop without upgrades
- Lead: Can pop with semi-expensive upgrades
- Better at indiviual bloons than at MOABs

Monkey Apprentice
The only reason I put this tower in here is because of its cheap lead popping ability. It can see camo and pop lead, which is a rare and useful combination. A 2/0 or 2/1 Monkey Apprentice is fine for the rest of the game at popping lead, mostly because of its lightning, which can pop many bloons at once, making it a nice tower for rushes. It is better at dealing with individual bloons than at MOABs.

Banana Farm
The banana farm doesn’t pop any bloons, but helps players get more money to purchase other towers. This is an incredibly useful tower if used correctly. I always use the 3/x or 4/x upgrades for typical farming because of its instant rewards. Be sure to place it when you can place it, because timing is key with this tower. Earlier is better, however, because you can make more profit off of the tower.
This post has been in progress for 3 days and is not finished.

